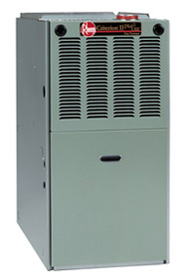
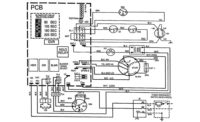
Warning: Disconnect the main electrical power to the unit before attempting any maintenance. Failure to turn off the electrical power may result in shock, causing personal injury or death.

Filters
1.Keep the air filters clean. A new home may require more frequent filter attention until dust from construction is removed.2. How to clean filters:
Plastic filters - Vacuum clean; wash with detergent and water. Air dry thoroughly and reinstall.
Cardboard and fiberglass - Discard when dirty and replace with a like-sized similar filter.
3. If using an electronic air filter, remove the filter furnished with the furnace and follow the maintenance instructions furnished with the electronic air filter.
Important: Do not operate the furnace without filters. Dust entrained with the air can lodge in the blower wheel, in the cooling coil fins, in furnace controls, in air ducts, and at the supply registers. Any recirculated dust particles are heated and charred by contact with the heat exchanger. This residue soils ceilings, walls, drapes, carpets, and other household articles.
Important: If replacing the factory filter with an aftermarket filter, always check the furnace temperature rise to be sure the airflow is adequate.
Note: Some filters must be resized to fit certain units and applications.
For example, some units require removal of a segment of filter and frame for proper width for a bottom or side filter.
Lubrication
The indoor blower motor sleeve bearings and induced draft motor are prelubricated and should not require attention for an indefinite period of time. However, these are some recommendations for service technicians:1. Motors without oiling ports - prelubricated and sealed. No further lubrication is required. In case of bearing problems, the service technician should replace the motor.
2. Motors with oiling ports – add 10 to 20 drops of electric motor oil to each bearing every two years for somewhat continuous duty, or at least every five years for light duty. Do not over-oil.
Excessive lubrication can damage the motor.
3. To access oiling ports or to relubricate sealed indoor blower motor bearing, remove the blower assembly and motor.
A. Remove the wiring from the control board compartment.
B. Remove the screws from the blower housing that secure the assembly.
C. Slide the blower assembly out.
D. Loosen the set screw(s) securing the blower wheel to the motor shaft, remove any motor ground wire, and remove the screws from the motor mounting bracket legs.
E. Slide the bracket assembly from the housing.
F. Lubricate the motor bearings.
G. Reassemble using the reverse procedure outlined above.
Exercise care when sliding the blower assembly back into the unit and be sure that it is reinstalled properly.
The service technician should clean the motor periodically to prevent the possibility of overheating due to an accumulation of dust or dirt on the windings and the motor exterior. If the motor needs cleaning, clean the blower wheel also. A blower wheel loaded with dirt or dust limits airflow, eventually causing furnace damage.
As suggested earlier, clean or replace the air filters. Dirty filters restrict airflow and adversely affect blower and furnace operation.
Burner And Heating Components
The furnace should operate for many years with no malfunctions. However, the service technician should inspect the heat exchanger passages, the venting system, and the burners for correct operation, and for any signs of corrosion. The heat exchanger passages and vent system should be inspected (and cleaned if required) by the technician annually.It is recommended that the heat exchanger be removed for inspection. However, with some products, this may not be feasible. If the heat exchanger is removed, the technician should follow these procedures.
1. Turn off furnace electrical power and set the thermostat to its lowest temperature.
2. Shut off the gas supply to the furnace either at the meter or at a manual valve in the supply piping.
3. Remove the burner door. On downflow and dedicated horizontal models, the blower door and burner door flange must also be removed.
4. Disconnect the gas supply piping from the gas valve.
5. Remove screws connecting the burner tray to the center panel.
6. Mark all wires on the gas valve for proper reconnection and disconnect the gas valve wiring.
7. Remove the burner tray and manifold assembly from the unit.
8. Remove all screws in the unit top plate. Remove the wires and tube from the pressure switch. Remove the top plate with the pressure switch attached.
9. Remove the draft inducer wiring. Remove screws connecting the draft inducer to the center panel. Take care not to damage the gasket behind the draft inducer.
10. Remove screws on heat exchanger perimeter. With hot surface ignition, remove the connecting screws along with the associated wiring.
11. With an upward and forward motion, lift the heat exchanger from the unit.
12. Clean or replace the heat exchanger, if necessary, and reinstall.
13. Reassemble the furnace in reverse order.
Warning: Holes in the vent piping or heat exchanger can allow toxic fumes to enter the home. Replace the vent pipe or heat exchanger if leaks are found. Failure to follow this warning may cause products of combustion to circulate into the living space creating potentially hazardous conditions, including carbon monoxide poisoning.
It is recommended that at the beginning of the heating season and about midway through the heating season the service technician visually inspect the main burners and pilot burner for proper flame characteristics.
Any furnace using existing high-temperature plastic vent piping must have the vent inspected annually for any cracks, pipe separation, or other deterioration of the vent material.
Important: At the beginning of the heating season, the flame sensor on electronic ignition units should be cleaned with steel wool by the technician.
Reprinted with permission from the 80% Low Profile Single Stage Gas Furnace service manual from Rheem Air Conditioning Division, Fort Smith, Ark. For more information, visit www.rheemac.com.
Publication date: 03/07/2005


