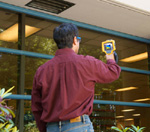
Thermal imaging can reveal anomalies in roofs and walls. (Click on the image for an enlarged view.)
Thermography, also known as thermal imaging, is well suited to identifying wet spots in building envelopes. As a diagnostic technique, thermography captures two-dimensional images of the apparent temperatures of equipment and structures. Thermal images can reveal anomalies in roofs and walls that can indicate the presence of moisture as buildings cool after having been under a thermal load. This happens because water conducts and stores heat better than most building materials. So, when a roof or wall cools, wet or damp areas cool slower than dry areas and show up as “hot spots” on thermal images.
The following discussion focuses on using thermal or infrared (IR) imaging to check for moisture in the envelopes of industrial, commercial, and institutional buildings, including moisture in roofs, walls, and insulation.

Cool areas on this roof exposure probably indicate moisture buildup. Mark with tape and investigate with core samples. (Click on the image for an enlarged view.)
WHAT TO CHECK?
Check the outside walls and roofs of buildings after they have experienced a thermal load, e.g., a solar load on a hot, dry day. East-facing walls might be checked in the afternoon and (in the Northern Hemisphere) south- and west-facing walls and roofs after sundown. A significant thermal gradient (15 or 20 percent) between the inside and outside is essential in order detect thermal anomalies attributable to the difference in heat capacity between the materials of construction and the additional moisture load.When potential wet spots in exterior walls and roofs are identified, follow up with an inspection inside the building, to further refine the outdoor findings. Inside inspections can also independently pinpoint moisture in ceilings and walls caused by leaks, water pipe breaks, fire sprinkler discharges or other water-producing events. Fast action with a thermal imager following a water-producing accident can identify which materials must be dried or replaced.
WHAT TO LOOK FOR?
Collecting thermal images is a good first step in analyzing a structure and identifying suspected problem areas. Unlike other moisture-detecting technologies, such as meters, thermography requires no physical contact with roofs, ceilings, walls or floors. In addition, you can check inaccessible areas and cover a large area in a single image.Regular building-envelope inspections are key to prolonging the lives of industrial, commercial, and institutional buildings. New construction and especially new roofs should be thoroughly inspected six to nine months after construction, while the structure is still under warranty. That time lag allows the structure to experience the elements, hopefully a rainy season. Then, perform additional building-envelope scans every two to five years. Compare them to the original, baseline images to establish trends and determine remedies to any deterioration. Experts estimate that preventive maintenance of this kind will double the life of a facility’s roof. Roof inspections should be conducted with the imager mounted on a tripod, so that the technician can concentrate on properly adjusting the camera to maximize the thermal resolution and analyzing the image.
WHAT REPRESENTS A "RED ALERT?"
Give any building-envelope condition that poses a safety or health risk the highest repair priority. Next, any roof leaks or moisture conditions that threaten production, electronic data, electronic equipment, or the integrity of the building itself should receive immediate attention.WHAT'S THE POTENTIAL COST OF FAILURE?
Flat roofs are the parts of commercial, industrial, and institutional buildings that are the most likely to fail, and they are expensive to replace. Factors vary so much from facility to facility that it’s difficult to put a price on roof replacements, but one expert writing in 1989 came up with a range of weighted averages between $4.50 per square foot for mechanically attached single-ply roofs and $8.00 per square foot for coal-tar built-up roofs.*FOLLOW-UP ACTIONS
Before checking a building for moisture, be aware that this kind of inspection constitutes one of the most challenging uses for IR thermography. Buildings vary with respect to kind, use, construction techniques, building materials, size, and so on.Conducting effective thermal building surveys requires understanding construction methods and the thermal characteristics of building components, as well as how to account for changing thermal conditions within and around buildings. Then, following the IR inspection, determine where inside heat sources are and whether they affected the exterior images. Finally, perform further analysis to confirm the findings. Infrared inspections provide the most cost effective means of ensuring that the roof is properly sealed, but the presence of a thermal anomaly does not indicate the presence of moisture in the roof. It is essential to follow up with core samples and other techniques. Reference ASTM C1153 Standard practice for location of wet insulation in roofing systems using infrared thermography.
When you have accurately identified moisture in a building’s envelope, targeted maintenance work can be performed. If you discovered the problem using a thermal imager, use the software that came with the instrument to document your findings in a report. Include a thermal image and a digital image of the relevant area of the building. Such reports are the best way to communicate the problems you find and to suggest repairs.
Safety Tip
Before starting a roof inspection, review the OSHA safety guidelines. Then, whenever you’re up on a roof doing an inspection, have a partner with you - day or night. Some people count on their radios. A radio alone is not good enough. People have died on roofs right next to their radios! Besides, your partner can mark the edges of areas of wet insulation while you scan the roof and make images.*Source: Benchmark, Inc., Roof & Pavement Consultants at 6065 Huntington Ct. NE, Cedar Rapids, IA 52402 - 319-393-9100. The figures are from an article, “Factors Affecting Roof System Costs,” by Kent Mattison, P.E.
Reprinted with permission from the Fluke Application Note “Moisture in Building Envelopes.” For more information, visit www.fluke.com.
Publication date:09/06/2010


