Like all mechanical devices, eventually these tools can fail or, even worse, fail to operate correctly. A failed tool, although an inconvenience at times, is not a major problem. A technician can default to another test tool to troubleshoot the system. However, a real problem is a tool that operates incorrectly. This can cause a real problem for a technician. Inaccurate test instruments can lead to misdiagnoses and/or wasted time on the job.
PRESSURE GAUGES
Technicians should regularly check these specialty tools for their accuracy. They should prove their instruments are functioning correctly.For example, the basic tool used by all technicians is the refrigerant pressure gauge. Technicians should regularly verify that their gauges are reading the correct pressure. Once, a technician was working on a system trying to resolve what he thought at the time was a high head pressure problem. After much wasted time, he realized his high-side gauge was the issue.
Checking the accuracy of refrigerant pressure gauges is relatively simple. Most technicians will apply a known pressure to the gauge that will cause a midspan deflection. If the gauge reads the correct pressure, it is accurate. If the gauge reads a different value from the known pressure, try adjusting the gauge to match the known pressure. Then remove the pressure from the gauge. The reading should drop to relatively close to zero. If it doesn’t, you should consider replacing the gauge.
For example, most low-side compound gauges have a range of 0 to 120 psig. Applying a pressure of approximately 60 psig would be ideal for calibrating this gauge. A dry nitrogen cylinder with a regulator can be used to apply a pressure to a refrigeration gauge. A cylinder of HFC-134a at room temperature can also be used effectively. At 71°F, R-134a will have a saturation pressure of 72 psig. When using a refrigerant cylinder, make sure the temperature of the refrigerant has stabilized to a known temperature (such as the ambient temperature) before using it to calibrate your pressure gauges.
THERMOMETER
A thermometer can be easily checked by placing it in a solution of crushed ice and water. Fill a bucket with crushed ice and add water so that three-quarters of the ice is immersed in the water. It is best to have a solution that has more ice than water. Let the temperature of the solution stabilize; it should stabilize close to 32°F. Once the temperature of the solution has stabilized, place the thermometer in the ice-water solution. Let the temperature measured on the thermometer stabilize and observe its reading. If the thermometer measures a temperature relatively close to 32°F, then the thermometer is relatively accurate. If not, the thermometer needs to be adjusted, repaired, or discarded.VACUUM PUMPS
Vacuum pumps and microgauges should also be checked. Simply connect your micron gauge directly to the vacuum pump using a vacuum-rated hose, then turn on the micron gauge and vacuum pump. In a relatively short time, you should see the pressure drop on your micron gauge. You should be able to pull at least 500 microns or less; if not, then you probably have a problem with one of these tools.SCALES
Refrigerant scales also need to be checked occasionally. An inaccurate scale can cause you to either over-or under-charge a system if using it to weigh in the refrigerant. The best way to test your scale is to find a known weight and measure its weight using your scale.LEAK DETECTORS
Another tool that should be checked is your electronic leak detector. Occasionally when removing your gauges from a system, have your leak detector ready to sniff the “de minimus” release of refrigerant. You can use this to verify if the leak detector senses the small amount of refrigerant being released. Avoid spraying refrigerant directly onto the leak detector’s sensor. Have the sensor just close enough to sense the release.MULTIMETERS
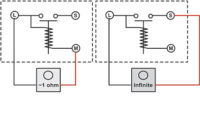
Yes, even multimeters should be checked. Once a technician was working on an ice cream freezer and measured 380V applied to a 208/230-V system. So, being a good technician, he went to the circuit breaker panel serving the equipment and measured the voltage entering the load center. Again he read 380V. So he told the customer the problem was a voltage supply issue and the electric company needs to correct it. The customer called the electric company, and the utility sent a technician over to investigate the problem. As the problem was explained, the technician from the electric company shook his head and went to get his voltmeter to test the incoming voltage. Guess what. He measured 228V at the load center. The refrigeration technician could not believe it. He took out his meter again and measured the voltage at 380V. Then the electrical technician said, “If the voltage was truly high, wouldn’t all the equipment have issues?” Of course all the equipment was not having issues. So the refrigeration tech looked at his defective multimeter and said, “Looks like it’s time for a new meter.” I guess he was right.Get into the habit of testing all your test instruments and verify they are operating correctly. Do not wait until you are on the job and have to guess if your instruments are accurate. That is a waste of time for you and your customer.
Publication date:04/04/2011


