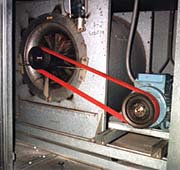
Hockey pucks are made this way. For HVACR motor belts, it’s not such a good idea.
The manufacturer’s Red Power II V-belt line addresses maintenance in larger horsepower units — commercial-industrial equipment, 25 to 30 hp and up.
When new belts are installed in these service and maintenance situations, technicians often need to go back and retension the belts, Steele said. This type of work is not needed with the Red Power II V-Belt, because “There is no stretch after the run-in period,” he said. “You don’t have to adjust for tension.” Standard belts should be checked every two to three months, he pointed out.

Engineered Belt
Belts also need to be able to bend, he continued. “It needs softness, yet it needs to be hard enough to transmit horsepower.”By preventing slippage, he said, the V-belt prevents the creation of still more heat. “For every 10 degrees C above the temperature the belt is rated to, belt life is decreased by half,” Steele pointed out.
This engineered belt is designed to carry more tension, he said. “It will transmit more horsepower.” This could reduce the number of belts on a given drive. It also reduces the load on the bearings and shaft of the fan, he said.
The product has a “different” rubber composition, Steele said. The base rubber is made of a high-temperature “recipe”; cord structure is higher grade-tension cord. Layers of fiber act to support tension loads without deforming the cross section.
“These are engineered belts,” Steele said.
The company is now working on a recipe specifically designed for fractional-horsepower fans.
The Red Power II V-belt line is available in 3-, 5-, and 8-V cross sections. The company claims this belt has about 42 percent higher horsepower capabilities than traditionally constructed V-belts.
The company says its V-belts are vulcanized in heated grooves while rotation occurs, which is the same mode of motion and shape in which they will subsequently give service, the manufacturer states.
Install It Correctly
The belts were designed for long life and high operating safety, the company points out. To prevent premature failure, make sure to follow the company’s recommendations.1. Make sure that all mating surfaces are clean and free of grease.
2. Fit the bush into the hub and line up the holes. “The half threaded holes should mate with the half plain bored holes,” the company points out.
3. Socket or cap screws “should be highly oiled and screwed by hand into the correct holes. They should not bind.”
4. Degrease the shafts; make sure they are clean. “Position the pulleys complete with the bushes in the correct places on the shafts.”
5. Fit the key between the shaft and the bush; make sure there is a small clearance between the top of the key and the keyway in the bush.
6. Use a torque wrench to tighten the set screws or cap screws to the values recommended.
7. After a short run (one-half hour to an hour), check the torque values of the screws; retighten if necessary.
8. “To prevent the ingress of foreign bodies,” the company says, “fill the bush split with grease.”
Alignment
If needed, level the motor and machine shafts using a spirit level.Note:Maximum misalignment is 0.5 degrees.After tightening the screws in the taper bushes, make sure that the pulleys are still aligned using a straight-edge held against the outside of the pulleys. Note: Make sure that the face widths of the pulleys are the same. For example, if one of the pulleys is deep grooved, “it is possible that the face widths may not be the same,” the company points out. “If this is the case, endeavor to align the center groove of each pulley to even out the groove spacing differences.”
Installation Pointers
For more information, contact Optibelt Corp., 1120 W. National Ave., Addison, Ill. 60101; 630-628-8400; 630-628-6175 (fax); www.optibelt.com.
Publication date: 04/21/2003


