Load Capacity/Duty Ratings
Load capacity is the combined weight of the user and materials.
Load Capacity 375 pounds – Special Duty/Professional Use – Type IAA Duty Rating
Type IAA typical uses:
Load Capacity 300 pounds – Extra Heavy Duty/Professional Use – Type IA Duty Rating
Type IA typical uses:
Load Capacity 250 pounds – Heavy Duty/Industrial Use – Type I Duty Rating
Type I typical uses:
Load Capacity 225 pounds – Medium Duty/Commercial Use – Type II Duty Rating
Type II typical uses:
Load Capacity 200 pounds – Light Duty/Household Use – Type III Duty Rating
Type III typical uses:
OSHA Requirements
To meet Occupational Safety and Health Administration (OSHA) requirements, climbing equipment must meet or exceed American National Standards Institute (ANSI) standards. All Type I, IA, and IAA fiberglass, aluminum, and wood ladders, ladder jacks, and extension planks meet or exceed requirements. OSHA regulations apply to ladders used in the workplace. Thus Type I, IA, or IAA rated ladders are recommended for such applications.
Staying Compliant
Many of the following safety recommendations will help you stay compliant with OSHA Regulation 29CFR 1926 Subpart X – Ladders.
Inspect:


Positioning Extension Ladders
Place an extension ladder at a 75-1/2-degree angle. The setback (S) should be 1/4 the length (L) to the upper support point. (See the illustration at right.) For example, if your upper support point is 20 feet, your setback should be 5 feet - S = 1/4 x L.
See Step 5 below for more information.

Extension Ladder Set Up
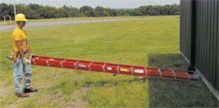
Step 1Block The Feet
The ladder should be closed. Position the ladder with the base section on top of the fly section. Block or "foot" the ladder against the base of the building or another secure object.

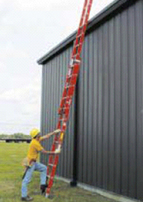
Walk It Up
Carefully erect the ladder by "walking" it up to a vertical position. Be sure the bottom is securely blocked against a fixed object or "footed" against another person.

Lift Into Position
First check for sufficient overhead clearance and make sure there are no power lines. Move the ladder away from the building so that it can he set at the proper angle.
Carefully and firmly grip the ladder before moving - keep it vertical.

Raise Fly Section
After checking again for overhead clearance and ensuring there are no live electrical wires, carefully raise the fly section using the rope and pulley system. After the bottom rung of the fly section clears the bottom rung of the base section, place one foot on the base rung to provide continuous firm footing.

Place Against Building
Carefully lean ladder against the building at the correct 75-1/2-degree angle. The base should be one foot out for each four feet of ladder length to the upper support point. Extend the ladder three feet above the roof edge for access. Be sure both end caps or contact points are resting firmly and securely against the building.
Reprinted with permission from On the Job, August 2005, Grainger's quarterly newsletter for professional contractors. Information is courtesy of Werner Ladder. For more information, visit www.grainger.com/contractor.
Note: This information has been checked for suitability. However, a successful solution depends on individual accuracy, skill, and caution. For this reason, W.W. Grainger Inc. does not guarantee the result of procedure compliance or assume responsibility for personal injury or property damage to persons following these procedures.
Publication date: 11/28/2005


